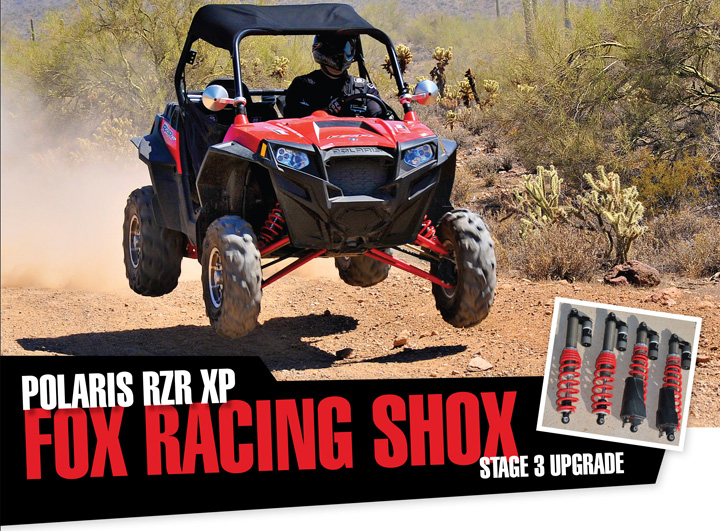
FOX RACING SHOX
POLARIS RZR XP STAGE 3 UPGRADE
PRICE: $550 a pair
Go to: www.foxshox.info/utvupgrades
or call: 1.800.FOX.SHOX
With the recent introduction of the Polaris RZR XP 900, throttle junkies are happier than ever with the power this lightweight unit possesses. As a bonus, this unit has the most travel of any factory-produced unit and is equipped with Fox Racing 2.0 shocks. In stock form, these shocks are amazing, charging through whoops at speeds that would toss lesser UTVs off the trail. If you own an XP, chances are you are already aware of this. And chances are you like to go fast through any type of terrain that you dare to. You may have also noticed that the ride is a little stiff in choppy terrain. No worries, backing off the compression will give you some improved ride quality. Awesome! But what if you experience the rear end kicking up a bit or it bottoms out after jump landings? Well, there is not much you can do unless you have the additional controls to compensate, like rebound control adjuster or dual speed compression adjuster. Fox Racing Shox now has this option for your factory RZR XP shocks as well as your RZR 4 shocks.
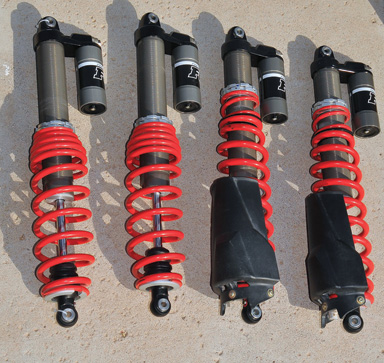
The factory Fox shocks on your XP only include a slow-speed compression damping setting. From the factory they are set at 10 clicks from closed of the 20 clicks available. This is the setting that, through their testing, is optimal for all types of terrain. The softest setting is 20 clicks from closed, and the firmest is 2 clicks from open. Depending on what feels right to you in your particular terrain will dictate these settings. If you are in need of additional control over your shocks, Fox Racing Shox has introduced an upgrade that will enable you to fine-tune your shocks (see article on page 38) at a fraction of the cost of a new competing aftermarket set. They offer a Stage 1 which adds Dual Speed Compression Adjuster; Stage 2 offers Rebound Control Adjuster; and Stage 3 includes both DSC and rebound adjusters. We sent our factory XP shocks off to the Fox service center in California for a full Stage 3 upgrade. In about a week’s time, we received our shocks complete with new DSC and rebound adjusters and a fresh Fox Racing Shox label on the piggyback reservoir denoting that these shocks have been upgraded. With shocks in hand, we bolted them on and hit the dirt.
We headed out the Boulders OHV Recreation Area near Phoenix, Arizona, which just happened to be the same area we first tested the RZR XP 900 with Polaris. This area has every size whoop imaginable and is our “go to” spot for testing and dialing in shocks. Our initial thoughts at that time were that the shocks seemed stiff, and on occasion the rear end would buck in the rear. At this test, we backed off the compression damping 4 clicks in the back and 3 in the front to gain a suppler feel. As for the slight bucking we experienced, there was nothing we could do. And while it did not initiate any control issues, at times it was a bit unnerving. We were anxious to give our new Fox Stage 3 upgrade a test and see what we could do to improve the ride quality, if anything.
We hit a familiar trail with continuous whoops for about 2 miles to warm up the shocks and get an idea of where adjustments should be made. Instantly we knew that we wanted to back off the slow-speed compression and slow down the rebound. Starting with the rebound settings first, we tightened it up 2 clicks in the rear to help keep the rear end stay flatter through the whoops. Slight bucking in the rear is typical on the XP, and now we could work it out. When making adjustments, be sure to adjust in 1-2 increments until your desired setting is achieved. Now that our XP was flying flat through the whoops, we focused our attention on ironing out the harsh ride. We softened up the compression by 2 clicks all the way around. We ran it again, then softened up the rear 1 more click. We ran it one more time and were able to run through the whoops with more speed and confidence. With these two adjustments completed, we wanted to adjust the high-speed compression settings. We reviewed our photographs and determined that the rear of the XP appeared as if it was not using all of its travel. Fox suggests that you want the least amount of high-speed compression damping as possible without bottoming. If you find that you are bottoming out, you need to increase HCS damping. We backed off the compression by 2 clicks, and after driving through our test course one last time we felt the suspension was more compliant. We could hammer through the whoops without any kicking, the ride was more supple and not as harsh over choppy terrain, and it enabled more upstroke travel without bottoming out.
The benefit of the Stage 3 upgrade is the amount of adjustability one can achieve. It may also be a negative unless you know what to look for and how to compensate. If you are just starting out, go to a trail that you frequently drive on. Find a section that you would like your RZR to perform better on. Take mental notes and adjust accordingly with 1-2 click increments. Write down your settings for reference. Generally these settings will be good on most trails you ride on. It all comes down to personal preference. Your settings may be different than your buddy’s, you may be carrying more or less weight, or you may have a different tire set-up. All these are a factor when setting up your suspension.
To get you started, here is a guide that will help you adjust your shocks.
REBOUND
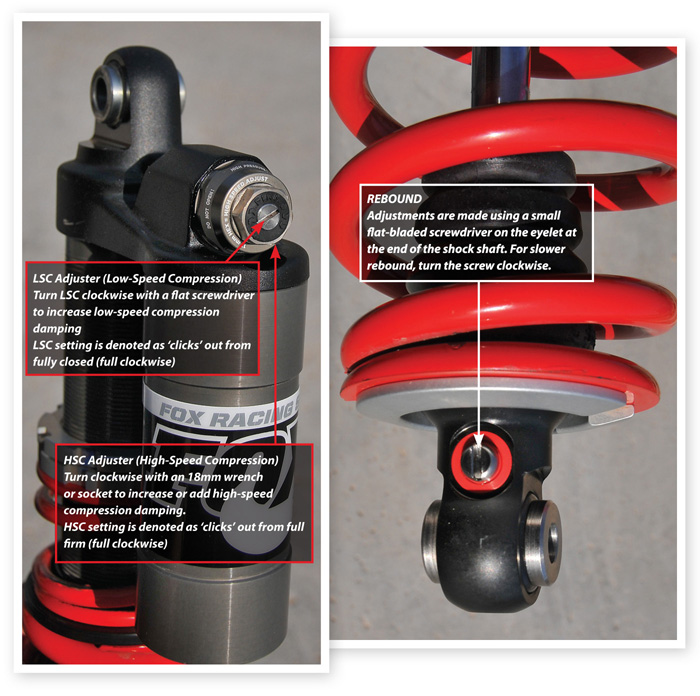
Adjustments are made using a small, flat-bladed screwdriver on the eyelet at the end of the shock shaft. For slower rebound, turn the screw clockwise. The rebound adjuster has about 24 clicks of adjustment, and the factory setting should be 12 clicks out. The rebound damping affects how quickly the shock extends (rebounds). This adjustment affects both low- and high-speed rebound damping. It will affect how quickly the vehicle rolls/pitches under acceleration and braking and will also affect how quickly the wheels rebound when travelling through a series of large bumps. The optimum rebound setting is usually found with the minimum damping required to give acceptable chassis control. Excessive rebound damping will typically be felt as the suspension “packing.” This can often be seen or felt as the vehicle travels through a series of similar sized, successive bumps. It works well for the first two or three bumps, then bottoms hard on the third or fourth. This is because the wheels aren’t rebounding quickly enough and the wheels “pack” into compression. For tight, flat surfaces you might like to run more rebound damping for more chassis control. For high-speed open desert running, you may prefer to run less rebound damping for maximum traction.
HIGH-SPEED COMPRESSION
High-speed compression (HSC) is adjusted with an 18mm wrench or socket to increase or add high-speed compression damping. HSC setting is denoted as “clicks” out from full firm (full clockwise). High shock-speed conditions, such as washboard ripples and hard hits will be affected. Increasing high-speed compression will reduce bottoming and keep the suspension further up in its travel. Adverse effects of too much high-speed compression include rough ride, insufficient suspension cycling (not using all of the available travel), and poor tracking on bumpy terrain.
More damping = stiffer = clockwise
The goal is to run as little high-speed compression damping as possible without bottoming.
LOW-SPEED COMPRESSION
The LSC (low speed compression) adjuster primarily affects the compression damping during slow suspension movements such as g-outs or smooth jump landings. It also affects wheel traction and the harshness or plushness of the vehicle. Turn LSC clockwise with a flat screwdriver to increase low-speed compression damping. Choose an LSC setting that gives good body control without causing excessive harshness or loss of traction.
PRELOAD
Preload is the spring tension on the shock, adjusted by rotating the threaded collar clockwise to increase preload, or counterclockwise to decrease it. Spring preload is mainly used to adjust ride height, or sag. A softer setting in the front will allow more front-end dive and body roll for increased traction under braking. A decrease in the rear will do the same but have an opposite affect on the machine’s handling characteristics. Preload should be carefully adjusted by 5-10mm increments, until the machine stays flat while cornering, accelerating, and braking. Also, if you carry a lot of weight in the bed, you can increase preload in the rear to bring the ride height back up.


